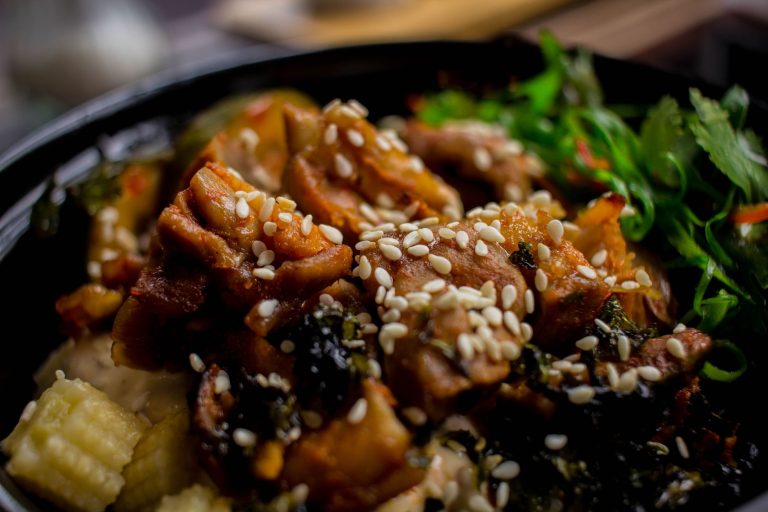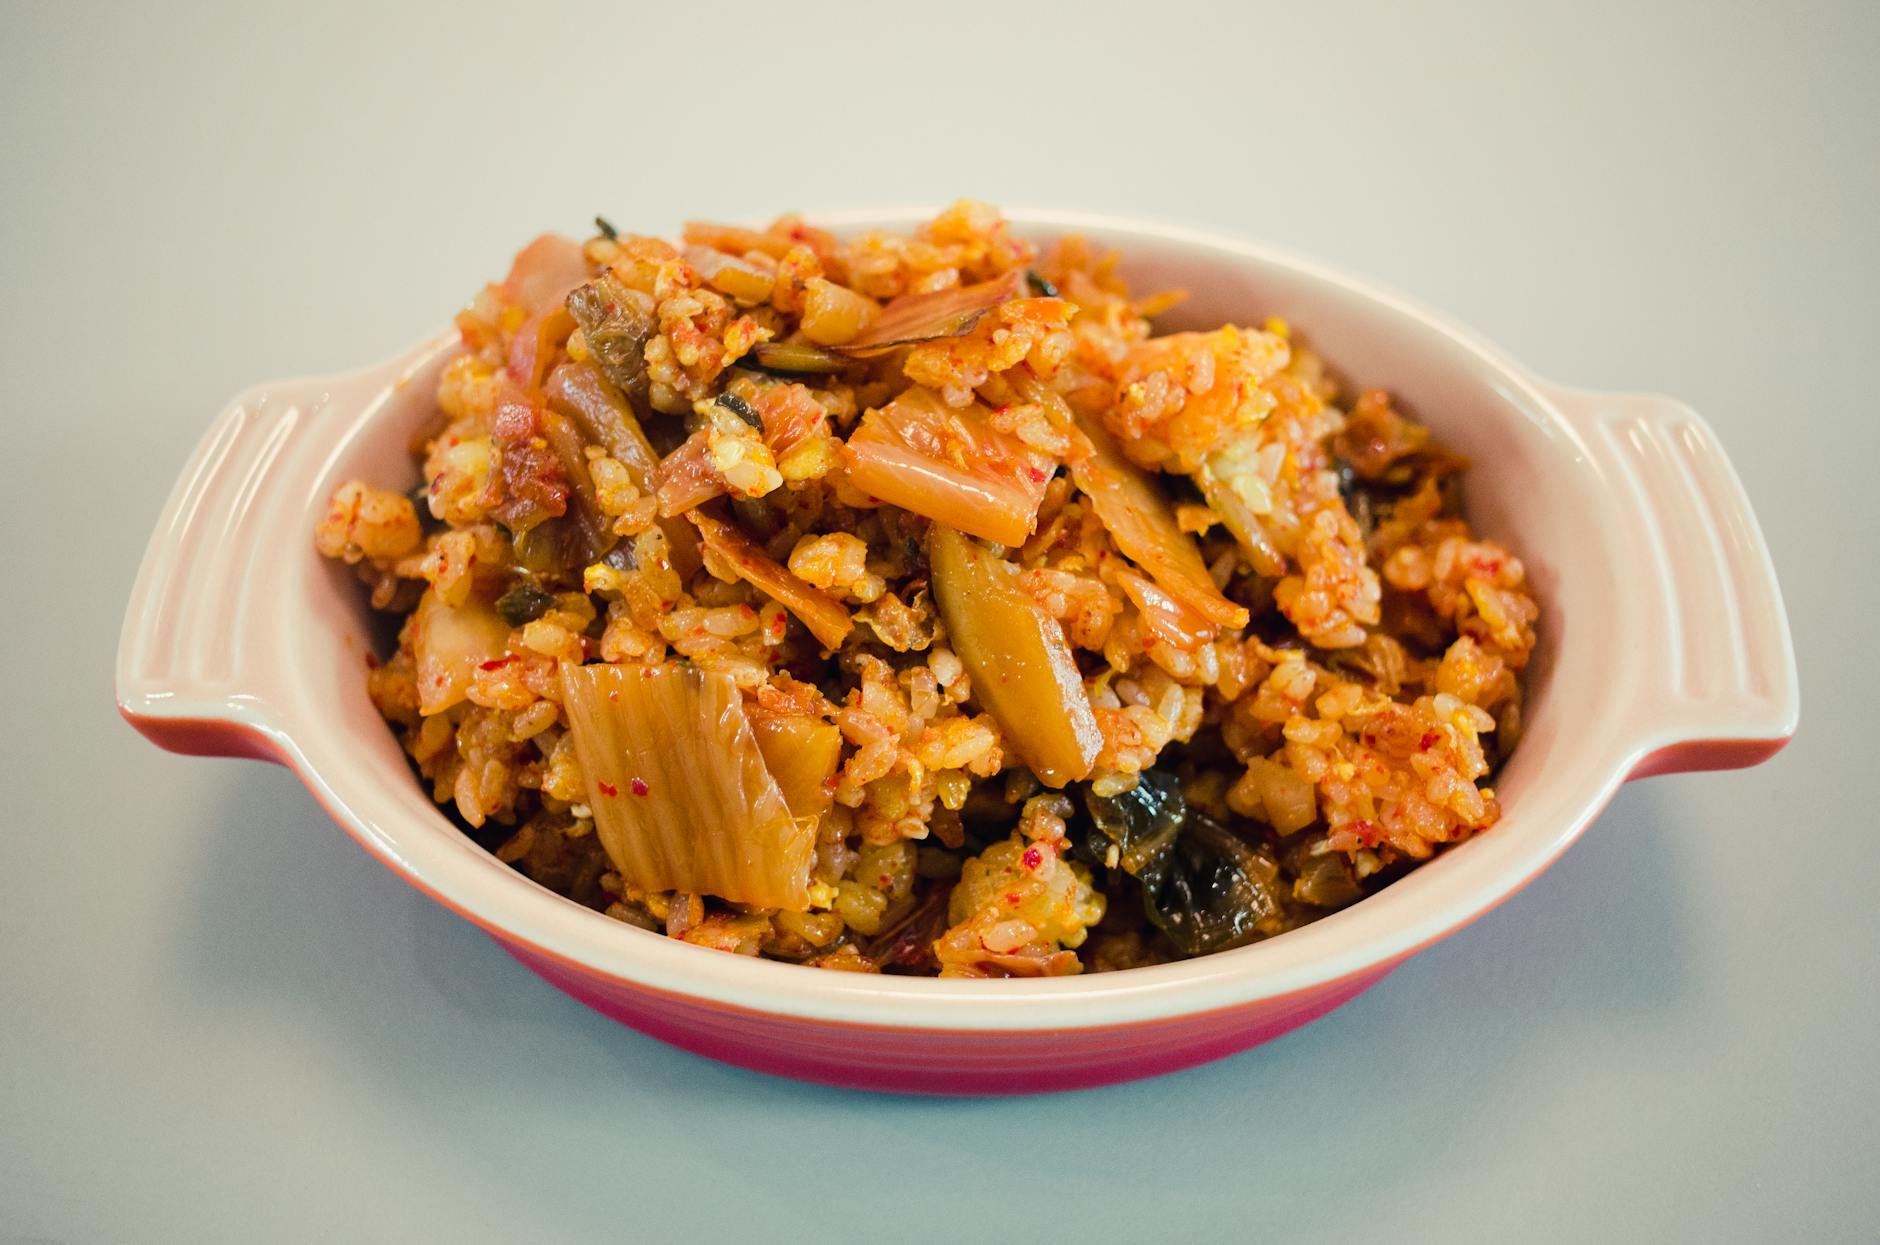
Gut-Health Glow-Up Kimchi Fried Rice
This Gut-Health Glow-Up Kimchi & Black Garlic Fried Rice is my current weeknight obsession. It’s the kind of cozy, punchy bowl that tastes like takeout but secretly gives your gut a big high-five. If you love bold flavor, crispy bits of rice, and that addictive kimchi tang, this one’s about to join your regular rotation.
Why You’ll Love This Recipe
- Gut-friendly and flavorful: Kimchi brings probiotics, while garlic, scallions, and sesame add layers of savory depth.
- Fast weeknight hero: Ready in about 20 minutes if you have leftover rice, using just one skillet or wok.
- Customizable and flexible: Swap proteins, use whatever veggies you have, and dial the spice level up or down.
- Budget-friendly comfort food: Transforms day-old rice and fridge odds-and-ends into a satisfying, restaurant-level meal.
Ingredients
- 4 cups (about 600g) cooked and chilled jasmine rice (day-old, cold from the fridge for best texture)
- 1 1/2 cups (about 210g) well-fermented kimchi (chopped, plus 3 tbsp (45ml) kimchi juice)
- 2 tbsp (30ml) neutral oil (avocado, grapeseed, or canola)
- 1 tbsp (14g) unsalted butter (optional but recommended) (for extra richness)
- 3 large eggs (lightly beaten with a pinch of salt)
- 4 stalks green onions (white and green parts separated, thinly sliced)
- 3 large garlic cloves (finely minced)
- 4-5 cloves (about 20g) black garlic cloves (mashed into a paste)
- 1 medium (about 70g) carrot (finely diced or grated)
- 1/2 cup (70g) frozen peas (no need to thaw)
- 2–3 tbsp (30–45ml) soy sauce or tamari (to taste, use tamari for gluten-free)
- 1 1/2 tsp (7ml) toasted sesame oil (added at the end for aroma)
- 1–2 tsp (2–4g) gochugaru or red pepper flakes (optional, to taste for extra heat)
- 1/4–1/2 tsp (1.5–3g) salt (to taste, depending on saltiness of kimchi and soy sauce)
- 1/4 tsp (1g) freshly ground black pepper (to taste)
- 1 1/2 tbsp (13g) toasted sesame seeds (for garnish)
- 1 small sheet, crumbled nori or seaweed snack sheets (optional, for extra umami and minerals)
- 1/2 cup (60g) cucumber or radish (thinly sliced for fresh, crunchy topping)
- 4 wedges lime or lemon wedges (optional, for serving)
- 1 cup (about 150–200g), cubed optional protein: firm tofu, chicken, shrimp, or tempeh (pan-seared separately if using)
Instructions
- Prep all ingredients before you start cooking. Chop the kimchi, separating any large pieces. Finely dice the carrot, slice the green onions (keep white and green parts separate), mince the garlic, and mash the black garlic into a paste. If your cooked rice is clumpy, gently break it apart with your hands or a fork so the grains are loose.
- If adding optional protein (like tofu, chicken, or shrimp), cook it first. Heat 1 teaspoon (5ml) of neutral oil in a large nonstick skillet or wok over medium-high heat. Sear the protein until cooked through and lightly browned, 4–6 minutes depending on type. Transfer to a plate and set aside.
- Make the soft scrambled eggs. Reduce the heat to medium, add 1 teaspoon (5ml) neutral oil and the beaten eggs to the pan. Let them sit for 10–15 seconds, then gently push and fold with a spatula until just set but still slightly glossy, 1–2 minutes. Slide the eggs onto a plate and set aside. Wipe out the pan if needed.
- Aromatics time. Return the pan to medium-high heat and add the remaining neutral oil and the butter. Once hot and shimmering, add the white parts of the green onions and the minced garlic. Stir-fry for 30–45 seconds until fragrant, being careful not to brown the garlic too much.
- Stir in the mashed black garlic and cook for another 30 seconds, pressing it into the oil so it dissolves into the aromatics and turns the oil a deep golden brown. This creates a rich, sweet umami base for the fried rice.
- Add the chopped kimchi and any extra kimchi juice. Increase the heat to high and stir-fry for 2–3 minutes, until the kimchi softens slightly, becomes fragrant, and some edges start to caramelize. This step concentrates the flavor while still keeping gut-friendly benefits from the fermentation.
- Add the carrot and frozen peas to the pan. Stir-fry for 1–2 minutes, just until the carrot begins to soften and the peas are bright green. You still want a bit of bite for texture.
- Add the chilled rice to the pan, breaking up any remaining clumps. Toss with a spatula to coat the grains in the kimchi-black garlic mixture. Spread the rice out in an even layer and let it cook undisturbed for 1–2 minutes so the bottom can get toasty and slightly crisp. Flip and repeat once or twice until some grains are lightly golden.
- Season the fried rice. Drizzle in 2 tablespoons (30ml) soy sauce or tamari around the edges of the pan (so it hits the hot surface first), then add the gochugaru if using, black pepper, and about half of the toasted sesame oil. Toss well to combine and taste. Add more soy sauce and a pinch of salt if needed, adjusting to your preference.
- Return the cooked eggs and optional protein to the pan, breaking the eggs into bite-size pieces. Gently fold them through the rice until everything is evenly distributed and warmed, about 1–2 minutes. Turn off the heat and stir in the remaining sesame oil and the green parts of the green onions.
- Serve the fried rice immediately in warm bowls. Top with toasted sesame seeds, crumbled nori, and crunchy cucumber or radish slices. Finish with a squeeze of lime or lemon juice over each bowl for brightness. Enjoy hot, with extra kimchi on the side if you like more tang and heat.
Pro Tips & Variations
- Always use cold, day-old rice: Fresh rice is too moist and can turn mushy; chilled rice fries up with those coveted toasty, separate grains.
- Don’t skip high heat: A hot wok or skillet gives you smoky, crisp edges and helps the kimchi caramelize without getting soggy.
- Boost the gut-health factor: Stir a spoonful of fresh, uncooked kimchi over each bowl at the end to keep more of the probiotics intact.
- Make it your own: Swap in brown rice or quinoa, add shredded cabbage or spinach, use plant-based butter and tamari for a fully dairy-free, gluten-free version, or top with a fried egg instead of scrambled.
Storage & Serving
Let the kimchi fried rice cool to room temperature, then transfer to an airtight container and refrigerate for up to 3 days. For food safety, avoid leaving it out for more than 2 hours. Reheat in a hot skillet over medium-high heat with a small splash of water or oil, stirring frequently until steaming and slightly crisp again, 3–5 minutes. You can also microwave in 45-second bursts, stirring in between, but the texture will be softer.
For meal prep, portion the fried rice into individual containers and store any fresh toppings (cucumber, radish, extra kimchi, lime) separately so they stay crunchy. This dish is hearty enough to serve on its own, but it pairs well with a simple cucumber salad, miso soup, or a quick pan-seared protein. Add a fried or jammy egg on top right before serving for an extra luxurious, brunch-y twist.
Nutrition (per serving)
Calories: 420 | Protein: 14g | Carbs: 56g | Fat: 15g | Fiber: 4g
Frequently Asked Questions
Can I make this kimchi fried rice vegan?
Yes. Use oil instead of butter, skip the eggs or replace them with scrambled tofu, and choose a vegan kimchi (many traditional kimchis include fish sauce or shrimp paste). Use tamari or a certified vegan soy sauce to keep everything plant-based.
What kind of rice works best for fried rice?
Medium- or long-grain white rice like jasmine works best because the grains stay separate when stir-fried. Day-old rice that has been chilled in the fridge is ideal. You can also use cooked brown rice for more fiber, but the texture will be chewier.
Is kimchi really good for gut health?
Kimchi is a fermented food, which means it can contain beneficial bacteria that support a healthy gut microbiome. Cooking reduces some of the live cultures, so for maximum benefit, add a spoonful of fresh, uncooked kimchi over your finished bowl.
How spicy is this fried rice?
The spice level depends on the kimchi you use and whether you add gochugaru or red pepper flakes. Use mild kimchi and skip the extra chili for a gentler heat, or add more gochugaru and a drizzle of chili oil if you like it spicy.
Can I use fresh rice instead of day-old rice?
You can, but the texture will be softer and a bit clumpier. If you only have fresh rice, spread it out on a tray and refrigerate or freeze it for 20–30 minutes to dry it out slightly before frying.
How do I keep the rice from sticking to the pan?
Use a well-seasoned wok or a large nonstick skillet, preheat it properly, and avoid overcrowding. A bit of extra neutral oil can help if your rice is on the moist side. Gently break up clumps with a spatula instead of mashing the rice.
You Might Also Like
- easy kimchi fried rice dinner
- high-protein one-pan rice recipes
- gut-friendly fermented food ideas