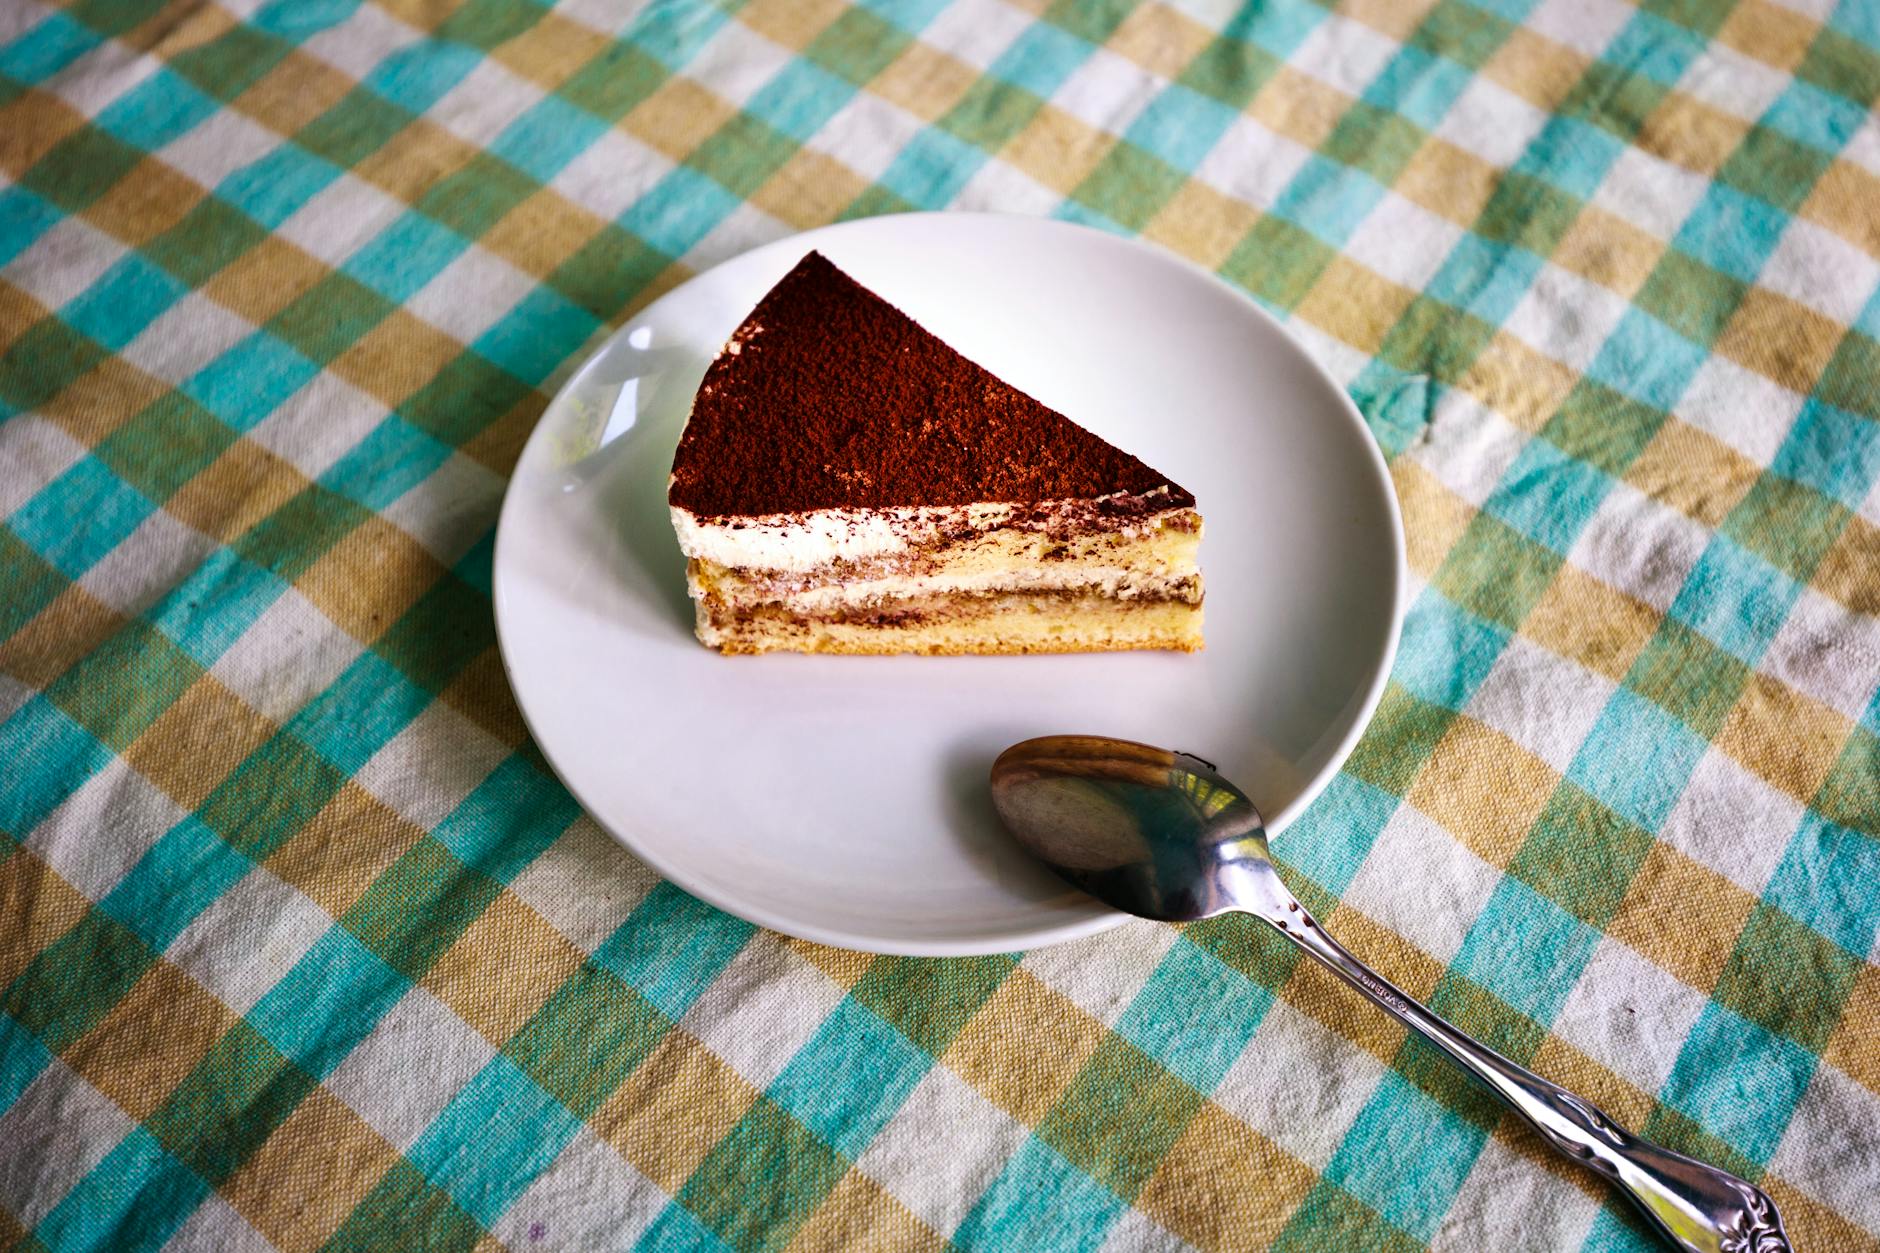
Classic Tiramisu Recipe (No-Bake Italian Dessert)
If you love coffee and creamy desserts, this classic tiramisu recipe is about to become your new party trick. It’s rich but not heavy, impressive yet surprisingly simple, and completely no-bake—perfect for holidays, date nights, or whenever the espresso craving hits.
Why You’ll Love This Recipe
- No-bake and make-ahead: Ideal for busy hosts—tiramisu tastes even better after resting overnight.
- Restaurant-quality texture: Light, silky mascarpone cream with just the right coffee kick.
- Flexible for any season: Dress it up with berries in summer or a dusting of cocoa and chocolate curls for cozy winter holidays.
- Beginner-friendly: Simple steps, familiar ingredients, and no special equipment needed beyond a mixer.
Ingredients
- 1 1/2 cups (360 ml), cooled to room temperature strong espresso or very strong coffee (freshly brewed is best)
- 1/4 cup (60 ml) coffee liqueur (optional) (such as Kahlúa or Marsala; omit for alcohol-free)
- 5 yolks (from 5 large eggs) large egg yolks (room temperature)
- 1/2 cup (100 g) granulated sugar (for the yolk mixture)
- 16 oz (450 g) mascarpone cheese (cold, high-quality Italian-style)
- 1 1/4 cups (300 ml) heavy cream (whipping cream) (chilled, 33–36% fat)
- 2 tsp (10 ml) pure vanilla extract (or 1 tsp vanilla bean paste)
- 7–8 oz (200–225 g), about 24–28 pieces ladyfinger biscuits (savoiardi) (crisp, not soft)
- 3–4 tbsp (about 15–20 g) unsweetened cocoa powder (for dusting between layers and on top)
- 1–2 oz (30–60 g), finely shaved or grated dark chocolate (optional) (for garnish)
Instructions
- Prepare the coffee soak: Brew 1 1/2 cups (360 ml) of strong espresso or very strong coffee and let it cool to room temperature. Stir in the coffee liqueur, if using, then pour the mixture into a shallow bowl wide enough to dip ladyfingers. Set aside.
- Set up a bain-marie (double boiler): Add about 2.5 cm (1 inch) of water to a medium saucepan and bring to a gentle simmer over medium-low heat. Reduce heat to low so the water barely simmers.
- Cook the egg yolks safely: In a heatproof bowl that fits snugly over the saucepan without touching the water, whisk together the egg yolks and granulated sugar until well combined and slightly lightened in color. Place the bowl over the simmering water and whisk constantly for 6–8 minutes, or until the mixture is thick, pale, and reaches about 71°C / 160°F so the yolks are pasteurized. Remove from heat and whisk for another minute off the heat to cool slightly.
- Incorporate the mascarpone: Add the cold mascarpone cheese to the warm yolk mixture in 2–3 additions, gently folding or whisking on low speed just until smooth and fully combined. Avoid overmixing, which can cause the mascarpone to turn grainy. Stir in the vanilla extract.
- Whip the cream: In a separate large, chilled bowl, add the heavy cream. Using a hand mixer or stand mixer fitted with the whisk attachment, whip on medium-high speed for 3–4 minutes until medium-stiff peaks form—the cream should hold its shape but still look silky, not dry or chunky.
- Fold cream into mascarpone mixture: Add one-third of the whipped cream to the mascarpone mixture and gently fold to lighten. Add the remaining whipped cream in 2 more additions, folding carefully from the bottom up with a spatula until no streaks remain and the cream is light and fluffy.
- Prepare the dish and ladyfingers: Use a 9×9-inch (23×23 cm) square dish, an 8×10-inch (20×25 cm) dish, or a similar 2–2.5 L (2–2.5 quart) baking dish. Quickly dip each ladyfinger into the cooled coffee mixture for about 1–2 seconds per side—just enough to soak the exterior while keeping the center slightly firm. Do not leave them in the coffee or they will become soggy.
- Assemble the first layer: Arrange the dipped ladyfingers in a single, snug layer on the bottom of the dish, cutting some to fit if needed. Lightly dust the top of the ladyfingers with cocoa powder using a fine sieve.
- Add mascarpone layer: Spoon half of the mascarpone cream over the ladyfingers. Spread it gently with an offset spatula or the back of a spoon to create an even layer all the way to the edges, smoothing the surface.
- Repeat layers: Dip the remaining ladyfingers in the coffee mixture as before and arrange a second layer over the mascarpone cream. Dust again with a light layer of cocoa powder. Top with the remaining mascarpone cream, spreading it smoothly and swirling the top if you like a textured finish.
- Chill to set: Cover the tiramisu tightly with plastic wrap or a lid and refrigerate for at least 6 hours, preferably overnight (8–24 hours). This resting time allows the flavors to meld and the ladyfingers to soften into a cake-like texture.
- Finish and garnish: Just before serving, dust the top generously with more unsweetened cocoa powder. If using, sprinkle with finely grated or shaved dark chocolate for extra flavor and a restaurant-style look.
- Serve: Slice the tiramisu into squares using a sharp knife, wiping the blade between cuts for clean layers. Use a small spatula or pie server to lift out each piece. Serve chilled on its own or with a few fresh berries for a seasonal touch.
Pro Tips & Variations
- Don’t oversoak the ladyfingers: A quick 1–2 second dip on each side is enough—too much and the dessert can turn mushy instead of soft and sliceable.
- Chill overnight for best flavor: While 6 hours works, an overnight rest develops a deeper coffee flavor and that classic cloud-like texture.
- Alcohol-free version: Skip the coffee liqueur and add 1–2 tsp (5–10 ml) rum extract or extra vanilla to the coffee mixture for a family-friendly tiramisu.
- Seasonal twists: For summer, layer in fresh strawberries or raspberries; for winter holidays, add a pinch of cinnamon or nutmeg to the cocoa and top with chocolate curls.
Storage & Serving
Cover leftover tiramisu tightly and store it in the refrigerator for up to 3 days. The texture stays soft and creamy, though the coffee flavor will deepen slightly over time. For cleaner slices, refrigerate until very cold and use a sharp knife wiped between cuts. Because this dessert contains dairy and eggs, avoid leaving it at room temperature for more than 2 hours. Tiramisu is best served chilled straight from the fridge, but you can let it sit at room temperature for 10–15 minutes if you prefer a slightly softer cream. This recipe also travels well—assemble it in a lidded dish and chill thoroughly before transporting to potlucks or holiday gatherings.
Nutrition (per serving)
Calories: 420 | Protein: 7g | Carbs: 38g | Fat: 26g | Fiber: 1g
Frequently Asked Questions
Can I make tiramisu without alcohol?
Yes. Simply omit the coffee liqueur and use plain strong coffee or espresso instead. For a flavor boost, you can add 1–2 teaspoons (5–10 ml) of rum extract or extra vanilla to the coffee soak.
Can I use regular coffee instead of espresso?
You can use very strong brewed coffee instead of espresso. Brew it at double strength so the flavor stands out after chilling and mixing with the cream and ladyfingers.
What can I substitute for mascarpone cheese?
Mascarpone is traditional, but if you cannot find it, you can use a mix of full-fat cream cheese and heavy cream (about 300 g cream cheese plus 150 g cream, beaten together until smooth). The flavor will be slightly tangier and less authentic, but still delicious.
How far in advance can I make tiramisu?
Tiramisu is ideal for making ahead. You can assemble it up to 24 hours in advance and refrigerate. For best texture, enjoy within 2–3 days of assembling.
Are the eggs raw in this tiramisu?
No. The egg yolks are gently heated in a bain-marie until they reach about 71°C / 160°F, which pasteurizes them and reduces the risk associated with raw eggs while still creating a rich, silky custard base.
Can I freeze tiramisu?
Yes. Freeze the assembled tiramisu (without final cocoa dusting) tightly covered for up to 1 month. Thaw overnight in the refrigerator, then dust with cocoa and chocolate shavings just before serving. The texture may be slightly softer but still enjoyable.
You Might Also Like
- easy no bake desserts
- Italian dessert recipes
- make ahead holiday desserts