Easy Chocolate Lava Cake Recipe
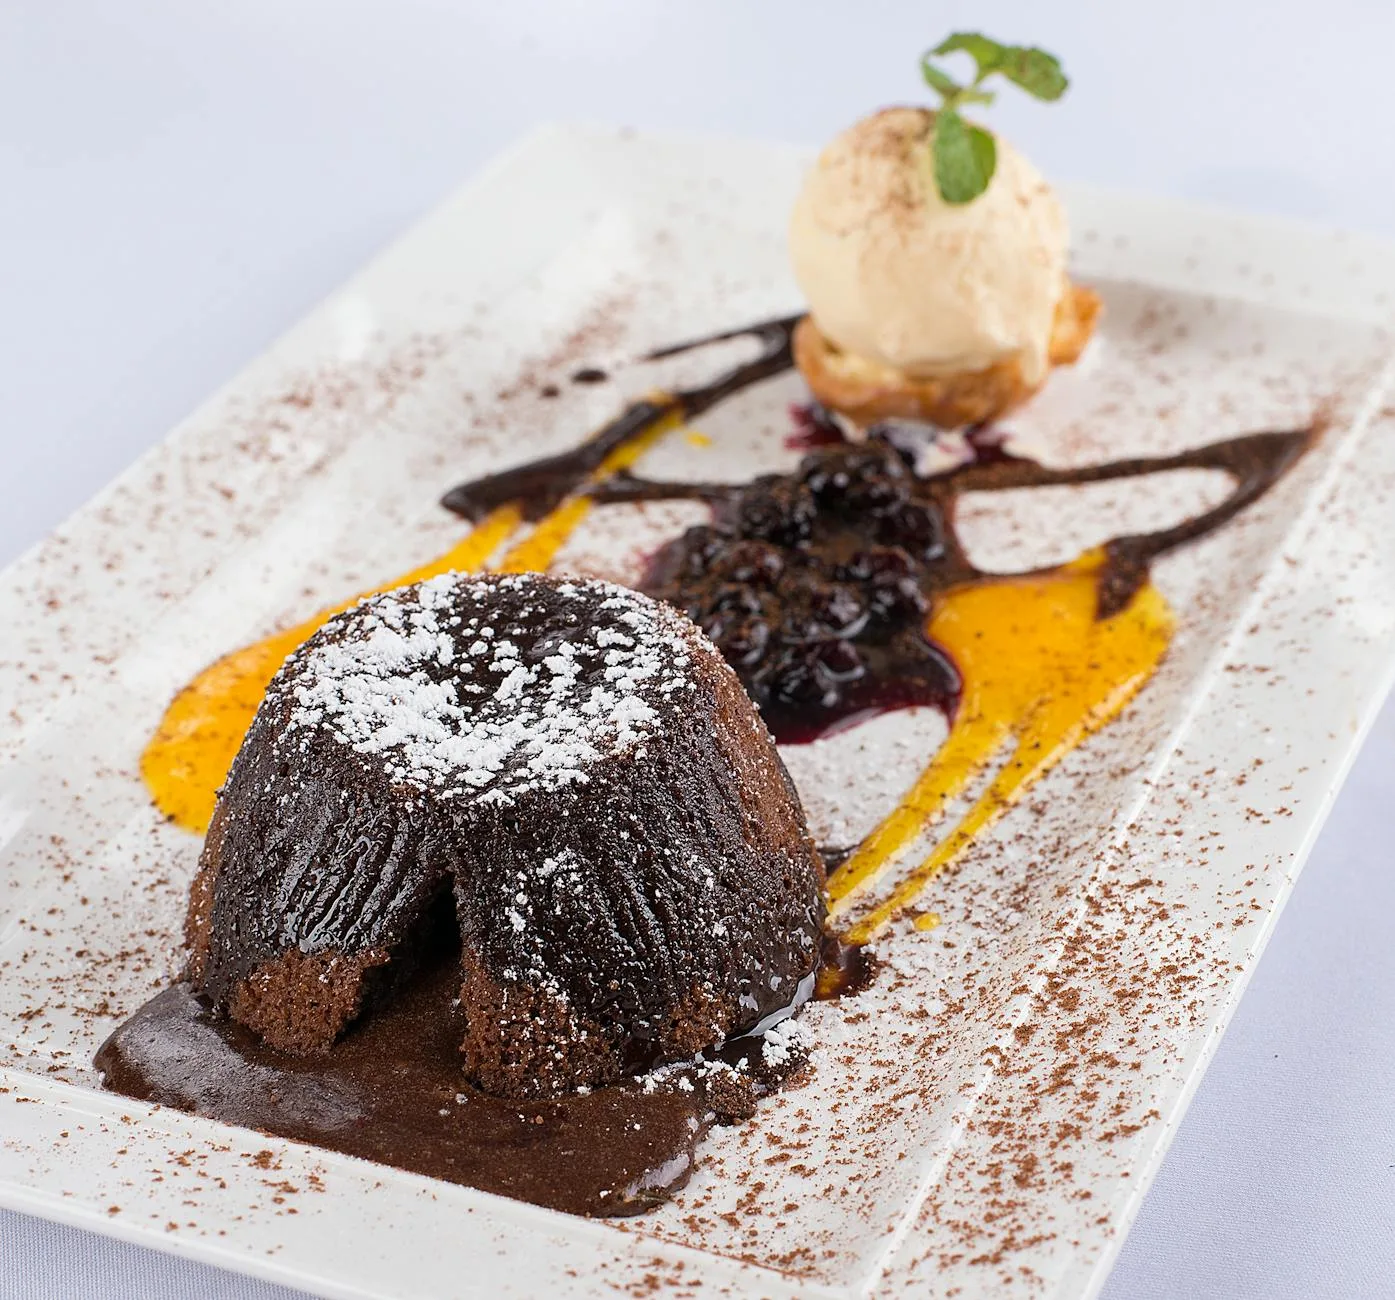
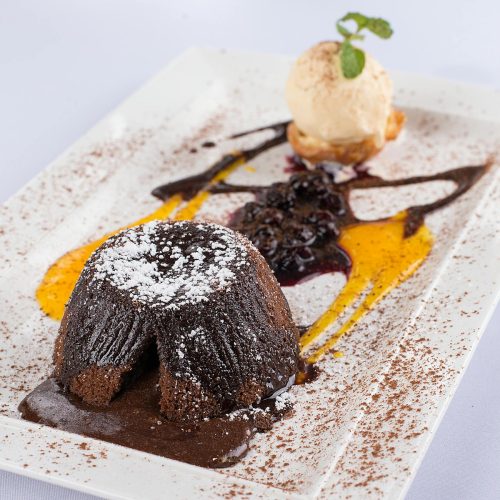
A chocolate lava cake is a small, rich chocolate cake baked hot and fast so the outside sets into a tender sponge while the centre stays liquid. Turned out onto a plate and cut open, it spills warm chocolate sauce. It needs only five main ingredients and about 30 minutes, and you can fill the ramekins up to a day ahead.
The difference between a molten centre and a dense little brownie is a minute or two in the oven, so this page is mostly about timing: how to read the cakes, how ramekin size changes the bake, and how to make them reliably in your own oven.
Makes 4 cakes.
Ingredients
- Soft butter and 1 tbsp unsweetened cocoa powder, for the ramekins
- 170 g (6 oz) dark chocolate, 60–70% cocoa solids, finely chopped
- 115 g (½ cup / 1 stick) unsalted butter, cubed
- 2 large eggs, at room temperature
- 2 large egg yolks, at room temperature
- 65 g (⅓ cup) granulated sugar
- ¼ tsp fine sea salt
- 1 tsp vanilla extract
- 25 g (3 tbsp) plain (all-purpose) flour
- Icing (powdered) sugar, to serve
- Vanilla ice cream, lightly whipped cream or crème fraîche, and berries, to serve
You’ll need four 175 ml (6 oz) ramekins and a baking tray.
The ingredients that matter
Chocolate. Use a good bar of dark chocolate with 60–70% cocoa solids, not chocolate chips. Chips contain less cocoa butter and often added stabilisers to help them hold their shape, which is the opposite of what you want here. Above 70%, the cakes become bitter and can set more firmly; below 55%, they taste sweet and milky.
Eggs and yolks. The whole eggs give structure; the extra yolks make the centre rich and custardy. Room-temperature eggs whip up faster and don’t seize the warm chocolate. To warm them quickly, leave them in a bowl of warm tap water for 5 minutes.
Sugar. 65 g gives a deep, not-too-sweet cake with 60–70% chocolate. Sugar also helps the eggs hold air, so don’t cut it much further.
Flour. There’s only a little, just enough to let the cakes hold their shape when unmoulded. Weigh it if you can: 25 g is about 3 level tablespoons.
Method
- Prepare the ramekins. Brush the insides of the ramekins thoroughly with soft butter, including the rims. Add a spoonful of cocoa powder, turn each ramekin to coat it, and tap out the excess into the next one. Set them on a baking tray. Heat the oven to 220°C (425°F), or 200°C (400°F) fan, with a rack in the middle.
- Melt the chocolate and butter. Put them in a heatproof bowl over a pan of barely simmering water, with the bowl not touching the water, and stir until smooth. Or microwave in 30-second bursts, stirring each time. Let it cool for 5 minutes, until warm rather than hot.
- Whisk the eggs. In a separate bowl, whisk the eggs, yolks, sugar and salt with an electric mixer for 2–3 minutes, or by hand for about 4 minutes, until pale, thick and roughly doubled in volume. When you lift the whisk, the mixture should fall back in a ribbon that sits on the surface for a second or two before sinking. Whisk in the vanilla.
- Combine. Pour the warm chocolate into the eggs and fold together with a spatula until no streaks remain. It should be glossy and smooth.
- Fold in the flour. Sift the flour over the top and fold it in gently, just until it disappears.
- Fill. Divide the batter between the ramekins; they should be about three-quarters full. You can stop here and refrigerate them (see make-ahead below).
- Bake. Bake for 12–14 minutes. They’re ready when the sides have risen, look firm and have started to pull away from the ramekin, and the top is set and slightly cracked but still soft in the centre. Give the tray a gentle shake: a circle about 2.5–4 cm (1–1 ½ in) across in the middle should wobble, while the edges stay still.
- Rest. Let them stand for 1 minute, no more. In that time the edges firm up enough to unmould. Leave them longer and the centres keep cooking.
- Unmould. Run a thin knife around the edge of each one. Put a plate upside down on top, and holding ramekin and plate together with a tea towel, flip them over. Wait 10 seconds, then lift off the ramekin.
- Serve immediately with a dusting of icing sugar, ice cream or cream, and berries.
Getting the timing right in your oven
Ovens vary more than recipes can allow for, and with lava cakes a difference of 10°C (25°F) matters. If you plan to make them often, an inexpensive oven thermometer is the best investment you can make.
For your first batch, consider baking one cake on its own as a test while the others wait at room temperature. Check it at 12 minutes, note the time that gives you the centre you like, then bake the rest.
How ramekin size changes things:
- 120 ml (4 oz) ramekins: makes 6 smaller cakes. Bake for 9–11 minutes.
- 240 ml (8 oz) ramekins: the batter sits lower, so the cakes are wide and shallow and the molten centre is smaller. Bake for 11–13 minutes and watch closely.
- Metal pudding moulds (darioles): metal conducts heat faster than ceramic and unmoulds very cleanly. Bake for 10–12 minutes.
- Muffin tin: grease and cocoa a 6-hole standard muffin tin and fill the holes three-quarters full. Bake for 8–10 minutes, rest for 2 minutes, then loosen each one and turn the whole tin out onto a board. They’re more fragile.
- Glass ramekins heat more slowly; add 1–2 minutes.
Common mistakes
- Overbaking. This is the most common problem. If the top looks completely set and firm, the middle has set too. Pull them when the centre still wobbles.
- Underbaking. If the cakes collapse when you unmould them, they needed another minute or two.
- Not greasing thoroughly. Any bare patch will stick and tear the cake. Butter every bit, including the rims.
- Adding hot chocolate to the eggs. It can scramble them. Let the chocolate cool until it’s warm.
- Leaving them to rest too long. One minute is enough. After that, the centre keeps cooking.
A note on egg safety
A molten centre means the eggs in the middle aren’t fully cooked. That’s fine for most people, but for anyone pregnant, very young, elderly or with a weakened immune system, use pasteurised eggs, or bake the cakes for 2–3 minutes longer so they’re fudgy rather than liquid.
Make ahead
- Fridge: fill the ramekins, cover them and refrigerate for up to 24 hours. Bake straight from the fridge for 14–16 minutes.
- Freezer: freeze filled ramekins, well wrapped, for up to 1 month. Bake from frozen for 16–18 minutes.
Baked cakes don’t hold their molten centre once cool. Leftovers keep in the fridge, covered, for up to 2 days. Warm one in the microwave for 15–20 seconds. The centre will be fudgy rather than runny, but it’s still a very good chocolate dessert.
Variations
- Guaranteed lava: roll 4 teaspoons of chocolate spread, salted caramel or ganache into balls and freeze them for 30 minutes. Fill the ramekins halfway, add a frozen ball, and cover with the rest of the batter.
- Gluten-free: use 25 g of a 1:1 gluten-free baking flour, the same type we recommend for our gluten-free chocolate chip cookies. With so little flour, the result is almost identical. Finely ground almond flour also works, giving a slightly softer cake.
- Mocha: whisk 1 tsp instant espresso powder into the eggs.
- Orange: add the finely grated zest of 1 orange, or 1 tbsp orange liqueur, with the vanilla.
- Peanut butter: drop 1 tsp smooth peanut butter into the centre of each filled ramekin.
A short history
Two chefs are usually credited with the molten chocolate cake. In France, Michel Bras developed his coulant au chocolat in the early 1980s, with a frozen ganache centre. In New York, Jean-Georges Vongerichten has said he created his version in the late 1980s when he took a chocolate cake out of the oven too early. Either way, by the 1990s it was on dessert menus all over the world.
What to serve with it
Something cold and plain works best against the warm, rich chocolate: vanilla ice cream, lightly whipped cream or crème fraîche, and a few raspberries or strawberries for sharpness. Because the ramekins can be filled ahead, it’s a good dessert for a dinner party. For a French bistro-style menu, start with our classic French onion soup, which can also be made in advance.
Measuring in cups or need a different oven setting? See our kitchen conversions guide.
Easy Chocolate Lava Cakes
Ingredients
For the ramekins
- soft butter, for greasing
- 1 tbsp unsweetened cocoa powder
Batter
- 170 g (6 oz) dark chocolate (60–70% cocoa solids), finely chopped
- 115 g (½ cup / 1 stick) unsalted butter, cubed
- 2 large eggs, at room temperature
- 2 large egg yolks, at room temperature
- 65 g (⅓ cup) granulated sugar
- ¼ tsp fine sea salt
- 1 tsp vanilla extract
- 25 g (3 tbsp) plain (all-purpose) flour
To serve
- icing (powdered) sugar
- vanilla ice cream, whipped cream or crème fraîche
- fresh berries
Instructions
- Butter four 175 ml (6 oz) ramekins thoroughly, dust with cocoa and set on a baking tray. Heat the oven to 220°C (425°F), or 200°C (400°F) fan.
- Melt the chocolate and butter together over barely simmering water or in 30-second microwave bursts. Cool 5 minutes.
- Whisk the eggs, yolks, sugar and salt for 2–3 minutes with a mixer until pale, thick and falling in a ribbon. Whisk in the vanilla.
- Fold in the warm chocolate until smooth, then sift over the flour and fold just until it disappears.
- Fill the ramekins about three-quarters full.
- Bake 12–14 minutes, until the sides are firm and pulling away and the top is set, with a 2.5–4 cm (1–1 ½ in) circle in the centre that still wobbles.
- Rest 1 minute, run a knife around the edge and invert onto plates.
- Dust with icing sugar and serve immediately with ice cream or cream and berries.
Notes
- Ramekin size: 120 ml (4 oz) ramekins make 6 cakes, 9–11 minutes; 240 ml (8 oz) ramekins 11–13 minutes; metal moulds 10–12 minutes; 6-hole muffin tin 8–10 minutes; glass ramekins add 1–2 minutes.
- Make ahead: refrigerate filled ramekins up to 24 hours and bake 14–16 minutes, or freeze up to 1 month and bake from frozen 16–18 minutes.
- The centre is not fully cooked; use pasteurised eggs for vulnerable guests, or bake 2–3 minutes longer for a fudgy centre.
- Gluten-free: use 25 g 1:1 gluten-free baking flour or almond flour.
- Leftovers: fridge up to 2 days; microwave 15–20 seconds (the centre will be fudgy).
Photo: Shameel mukkath on Pexels